Pattern: Orangina by Stefanie Japel (it's actually cheaper when you buy the PDF from Ravelry: http://www.ravelry.com/patterns/library/orangina
Yarn: "Seidenglanz" by Schachenmayr nomotta, 100 % cotton, 125 m/ 50 g26 st x 36 r = 10 cm x 10 cm, recommended needle size: 2.5 - 3.5 mm; one of my friends said that the yarn is now called "Catania". I can't remember exactly how "Catania" looks like, but I think it does look similar. Each ball had a couple of knots.
Color: 158
Price: €1.25, reduced from €1.75
Amount: 4 balls
Needles: 3.25 mm for the body and 2.5 mm for the ribbing. I would have preferred 2.75 mm needles, but didn't have circulars in the right length.
Gauge: 18 stitches (2 pattern repeates) in 9 cm
Dimensions: 9 pattern repeats each for front and back
Modifications:
Made it smaller. I was afraid it would emphasize my shoulders too much if it was too wide. The ribbing is also lower, but that's just because I assumed that with blocking the body would shrink lengthwise, so I knit a couple rows more. It didn't really shrink and I was just too lazy to rip back again and I thought that this piece was already full with mistakes anyway. And also, it looks ok that way. If I hadn't liked the look of it I probably would have ripped back.
I knit the top in the round after the armholes. If you knit in the round, you can reduce some stitches, but be aware - you can not just line the pattern repeats one after another. It will not work where the beginning and the end of the row meet. At the sides you need to keep some of the edge stitches. Trust me, I've repeated this over and over again until I finally understood that my knitting was correct and it just did not work out, no matter what I believed.
After joining to knit in the round and after like 10 cm I tried it on and realized that the armholes are too big. - I just don't know why they were too big! AAAAHHHH! I had measured it! At this point and after ripping back so much I decided to make the armholes smaller by sewing the side seams together.
Comments:
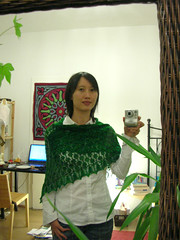
The yarn doesn't seem to be a great quality. Usually I don't block garments inbetween, but in this case I wanted to check the length of the lace part (I turned out to be longer then expected, but just couldn't bother anymore), so I soaked it in water, meaning, I did not wash it with any detergent, just soaked in water and then blocked it. After drying, checking the length, etc, I continued working on the ribbing, and guess what, there is a color difference. You can even see it in the picture.
The edge around the neck curls. The swatch was ok, but here the edge curls. I just blocked it again, but still, it seems like the curled edge is going to stay.
I think I like it, despite the armholes and the curling edge.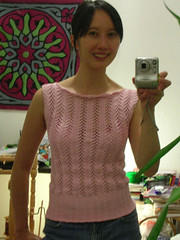
Sunday, August 16, 2009
Finished: Orangina in pink
Saturday, July 25, 2009
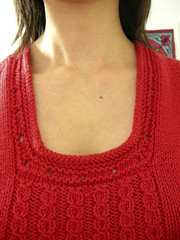
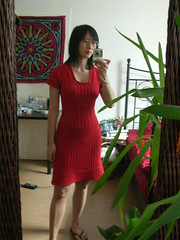
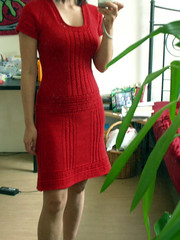
Finished: Saturday In The Park Perfect Dress
Pattern: Saturday In The Park Perfect Dress from Fitted Knits by Stefanie JapelKnits
Yarn: Filosoft by Wolle Rödel, 52 % merino, 48 % cotton, handwash at 30 °C, recommended needle size 4 -5 mm, recommended gauge 22 st x 28 rows = 10 cm
Color: red (1205)
Price: €3,75 per 50 g ball?
Amount: 12 (one was needed for swatching)
Needles: 3.5 mm
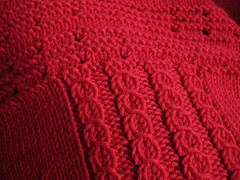
Gauge: 24 st x 32 rows = 10 cm in stockinette and mock lace cable pattern. On the label the recommended gauge is 22 st x 28 rows, but I was afraid that the dress would sag at the bottom if it was knit too loosely and I tend to like my knitting to be a bit tighter than what is usually recommended on the label.
Dimensions: I measured myself and calculated the amount of stitches that was necessary to make the dress fit. The dress has negative ease (a couple of cm).
Modifications:
20/06/2009
Cast on 242 stitches. I’m doing it top up. This top down raglan thing according to my calculations is not working out for me.
After the hem pattern decreased by 2 stitches = 240.
Divided them into sections of 20 stitches. Alternating sections with stockinette stitch with mock cable pattern.
After 18 rows: decrease 2 stitches in each stockinette sections: k5, k2tog, k6, ssk, k5
6 x 2 stitches => 228 stitches
After 24 rows: decrease 2 stitches in each stockinette sections: k5, k2tog, k4, ssk, k5
6 x 2 stitches => 216 stitches
After 24 rows: decrease in the mock cable sections:
p1, cable, p2tog, cable, p2, cable, p2tog, cable, p1
6 x 2 stitches => 204 stitches
After 12 rows: decrease in the mock cable sections:
p1, cable, p1, cable, p2tog, cable, p1, cable, p1
6 x 1 stitch => 198 stitches
From hip to waist: 20 cm = 64 rows
After 12 rows: - 18 st: => 180 st
* Two decreases in each of the stockinette sections: 6 x 2 st decreases = -12 st
* 3 x 1 purl st dec in the mock cable section = - 6 st
I wanted the stitches to be a multiple of 5, because of the pattern.
I now repeated the hem pattern for the hip section. I got the idea from Monikita:
http://www.ravelry.com/projects/Monikita/saturday-in-the-...
After 9 rows: - 10 st => 170 st
Decreases are worked on the sides. That creates the least disruption of the pattern. And I guess, that’s just what you do? From now on, decreases and increases are worked on the side
After 9 rows: - 10 st => 160 st
After 8 rows: - 10 st => 150 st
After 9 rows: - 4 st => 146 st
* On the side: ssk, k3, k2tog
150 st /2 = 75 st. This means my center on both sides was not between two stitches, but on a stitch.
I think it should have been between two stitches, but anyway, trying to distribute the decreases nicely was tricky enough.
After 9 rows: - 4 st => 142 st
After 9 rows: - 4 st => 138 st
After the hip section I added a central cable section (30 st wide).
Now I started increasing.
9 times every 7th row 4 increases => 174 st
On row 49 I added short rows. There supposed to start like 1-2 inches from the armhole and end 1 inch from the bust point. So, I made 4 short rows, 3 stitches apart. Starting 5 stitches from center stitch on the side. Ending 11 stitches from the center cable section. I find the short rows look a bit weird, ending above my bust point?
Armhole shaping:
I now had to separate into back and front and decided that the center stitches on the side would be added to the front.
Decreases for the back and front: 3-2-2-
Neckline:
At the same time, after 4 rows (counting from where I separated the sleeves) I bound off the central cable section.
Sleeves:
Cast on 70 st. Added cables. Increased 2 st. => 72 st Knit two rows. Decrease 3-2-2 on both sides.
Connecting sleeves and body part:
Use two circular needles, one for the front and halves of the sleeves. The other one for the back and the other halves of the sleeves. Knit 4 rows. Decrease in front and back. Two stitches between the decreases.
19/07/2009
Picked up 3 stitches for every 4 stitches in the front and back and 3 stitches for every 5 rows. Neckline is a bit different. I didn’t turn at the purl line and instead just let it curl. It’s nicer and stretchier that way. Folding at the hem was good, but at the neckline it looked ugly. Did the same for the sleeves. I think the raglan sleeves do make my shoulders look a bit bigger.
Comments:
I'm happy with the dress.
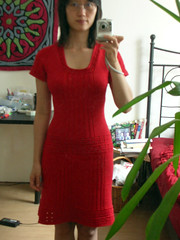
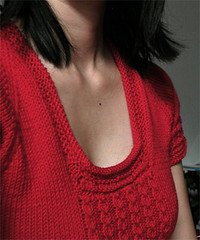
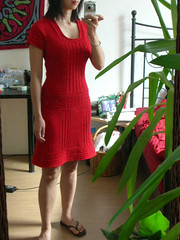
By the way, I just hate that my blog looks so messed up. And it's so much work customizing a new template.
Monday, June 01, 2009
Finished: Molly Ringwald in green
Pattern: Molly Ringwald by Michele Rose Orne in Knitscene, Fall 2006
Yarn: Flora (Linea Pura) by Lana Grossa; cotton-soy blend (60 % organic cotton, 40 % organic soy), 140 m/50 g, recommended needle size: 3.5 - 4 mm
Color: green
Price:€ 5.65? € 4.50
Amount: 5 balls
Needles: 3 mm and 2.75 mm (for casting off), a small crochet hook
Gauge: 26 stitches x 36 rows = 10 cm
Dimensions: I cast on the same number of stitches as for the smallest size. Remember though that my gauge is different. The gauge for the original design is 22 stitches 28 rows.
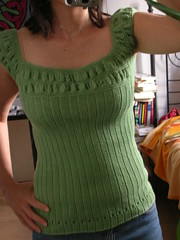
Modifications: I wanted to wear this in summer without anything underneat, so I made this a quite figure-hugging top. Also many knitters said that it was better to go down at least one size with that design. When I look at my back, which is gaping a bit, I'm not surprised.
The piece with the ruffles is as long as in the original design. Since the whole thing had less width though, I didn't have straps anymore where I could attach the sleeves. I find my armholes are a tad small. It's not bad, but surely they could be a bit bigger.
Since the yarn is thinner, I thought I could do what Muhv did and make the ruffles more, uh, ruffly - k, ktbl, m1 out of strand inbetween. By the way, I must add that I like ruffles, but I hate knitting them. I used an Addi bamboo needle and after the ruffles, bits of one needle tip had been chipped away.
Added short-rows. That website was helpful: http://www.thedietdiary.com/knittingfiend/OrderForms/BustDarts.html
And that oneexplains well how to do short-rows without any wraps, pins (Japanese short rows), etc:
http://kaityvr.wordpress.com/2007/05/28/the-easiest-way-to-do-a-short-row-heel/
I was a bit concerned that it would be too tight. In the end, I think the short rows were good, because they also added length to the front part of the top and kept the neckline somewhat straight and not have it hanging. Lengthwise I could have needed a couple of rows more. If I keep the neckline straight, the hem rides up a bit.Left out the crab stitch. It’s true though, you should do a tight single crochet round with a small hook around the neckline. Doing the single crochet round improved the fit of the top. Doing the crab stitches even more. That makes the neckline less floppy.
Comments: I think it's a good thing I made this top smaller. Cotton is heavy and I can't imagine a loose fitting top made of cotton to look good. It probably would look like a bag. Apart from the ruffles, the whole top is knit in rib, which stretches somewhat, when you fill it out. I've only worn it once and I still think it had grown a bit. My neckline at the end of the day was a bit lower.
Confession: I didn't wash my swatch. I should have done it, but I didn't... I wanted to start knitting and when you wash your swatch you have wait at least a day in most cases. And after I had started knitting I didn't want bad news from the washed swatch. This is the ostrich-head-in-the-sand-method. Sometimes it works well. More often it doesn't. You've been warned...
The top was a big PITA to knit, because of all the modifications, but overall, I'm pretty content with how it turned out. I actually like it better than the original design. I just hope it won't grow too much with wearing.
The yarn feels ok. I have the same yarn in white and that one is quite soft and feels nice though.
The color is more accurate in the first picture.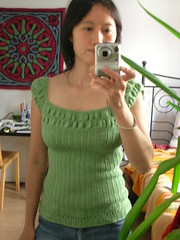
Friday, March 20, 2009
Finished: Dress 09 from Rebecca no. 35
Pattern: 09 grey dress from Rebecca #35
Yarn: "Cumba" by ggh, 42 % virgin wool, 28 % alpaca and 30 % acrylic(150 m/ 50 g)
Color: natural white
Price: € 3.95 per ball (that's the offical price for the yarn, but it's been a while since I bought it, so I'm not sure what I paid then. I bought it at Lanaiolo, the same yarn shop where I bought the yarn for the orange dress, also a design from Rebecca. Did I mention that I got the magazine for free when I bought the yarn for the orange dress? :) (I think I got it for free?) )
Amount: theoretically you need 9 balls, but of course I'm so talented that I only needed 7, ha! I say it's 7, because I'm counting 2 balls that are left, but there could be more somewhere else. I had to start one ball to do the neck, but I didn't need a lot.
Needles: 3.75 mm I wish I could say I'm a 100 % sure that it was this size, but sorry, I've been really really tired for a couple of weeks and I think it's taking a toll on my memory. By excluding other potential needle sizes I've come to the conclusion that it's very likely that one. By the way, recommended needle size is 4-5 mm.
Gauge: well, something completely different!!!!
Dimensions: size 34/36, theoretically
Modifications: Many! I started knitting this dress last year, thinking it was going to be a nice mindless project since I bought the original yarn, meaning no re-calculations, you just swatch until you find the right needle and then off you go. That was the plan. I made a swatch and then left it at some place where I couldn't find it anymore. I remembered that the gauge was correct though.
I started knitting the skirt part, which seems so easy but I can't remember how many times I ripped back. It was too short, too long, then I decided that the waistline of the original dress was too high up. I'm not really a fan of baby doll dresses and less if they are knitted. This also meant that that the skirt part was too long again!!!! The good thing is, the yarn endured all the ripping back patiently. You can rip back as much as you want and it's going to be fine. At the end of the skirt part, you do some decreases, which I did, but I also added about 10 rows more instead of continuing with the bodice part, because I was afraid that the skirt would look too puffy and I wanted it to taper off slowly.
The next step after deciding on the length of the skirt and the position of the waistline I proceeded with the bodice part. I must confess that I also derived a lot of pleasure from knitting this - ha, ha, ha! After a couple of cms people started making comments about the smallness of the dress. My initial unwavering optimism deflected any kind of doubt, but after a while it cracked down and I had to admit that it did look indeed small. Which meant - I had to swatch. My new swatch told me that the size was indeed good enough for my waist, but would cause problems later on. The bodice part is knit straight, there is no shapping, which usually would be ok as the pattern is very stretchy, but in my case I had to do work in some increases. I tried short rows, but the pattern is very ungrateful for that kind of thing, so I just increased on both sides until I had the same number of stitches as for the next size 38/40. My swatch told me that it would be ok if I did so, but I think I was just wishing that life be easier, meaning if I didn't have to think too much and just follow the instructions. If it couldn't be the instructions for size 34/36 it could at least be the instructions for size 38/40, right?
Anyway, I also decided that the neckline was too high and I wanted the shoulders to be less wide. I made the decreases and hoped they would look fine. For the neckband, I picked up stitches from every second bindoff stitch and row. I assumed that the pattern would stretch a lot.
The sleeves were knit without any modifications. Halleluja! :D
Comments: It's tight around the bust. I wasn't sure if it was still ok or just wishful thinking. I decided to be brave (also because the friend that I called to check the dress was already at the knitting group) and just go to the knitting group. Thankfully, my friends liked it. If not, I would still not have ripped back!
After blocking it looked a little bit off. I just wanted to finish the damn thing and did not take great care with the blocking, so the edge of the skirt were scalloped and very uneven in height. Strangely, I wasn't much concerned about that. I thought I would give it a good washing and then it would shrink back. And of course, I was right. :D In the end, you can block as much as you want, but there is a limit. And I think, I was also lucky with the yarn.
The yarn is nice and soft. And it seems to be robust. I really liked that you could rip back so much and it still looked fine. I recommend it.
Oh, I forgot to tell. The next day, after I finished my dress, I was doing some cleaning up of my stash and other knitting stuff and I found my swatch! The small one is my second swatch and as you can see, the gauge is completely different. I have no clue what happened. Maybe I used a different needle size for the first swatch. It's possible that I knit the skirt part with a smaller needle and then wanted to switch to a bigger needle. The other explanation would that my knitting is very moody - sometimes I knit tight and sometimes I knit loose - but that strikes me as a very strange explanation.
I think next time I would either add more repeats to make it wider or go up a needle size. I tend to going up a needle size, because I actually like the first swatch it is softer and the stitches don't look so tense.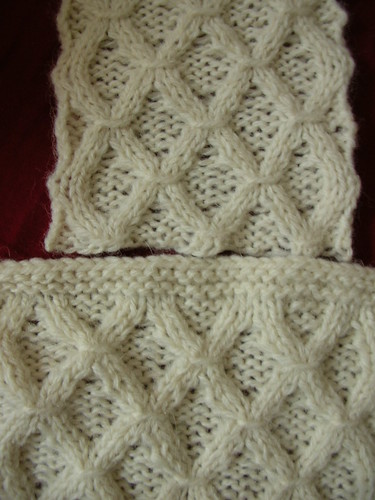
By the way, I just realized that a couple of images from the blog template are missing!! Grrrrr...
Saturday, January 10, 2009
Mittens and a wrinkled dress
I finished the "Summersplash" yarn and I'm quite happy with it. I just don't know what to knit with it? Another Morning Surf Scarf? I don't have one, but maybe I can find something else that goes well with the yarn, too.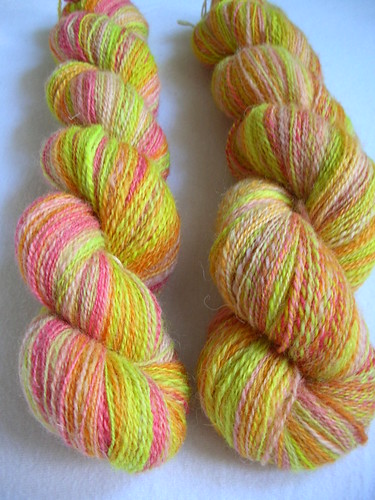
Currently I'm working on two items - fair isle mittens and a winter dress.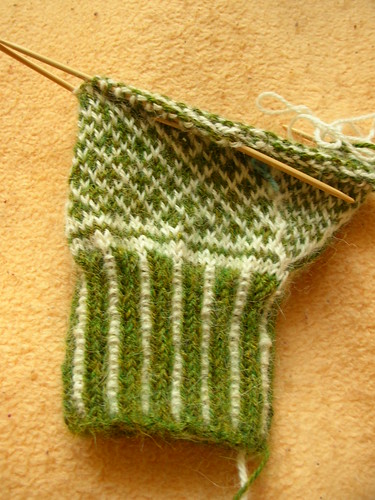
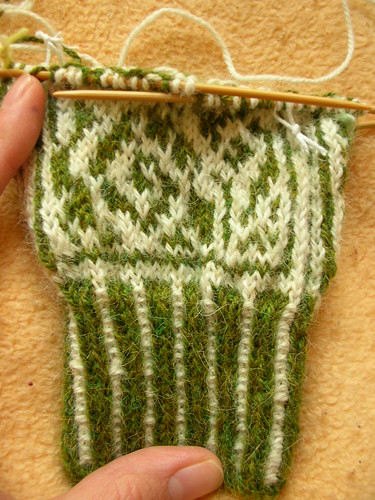
This is the first fair isle project I'm doing (apart from playing around with swatches here or there) and I'm quite pleased with my tension. The back part with the spirals puckers a bit, but the palm side is quite nice.
The dress might have been finished already if I wasn't ripping back so much. It's not difficult to knit, but I continue to make modifications, which I don't like, but I think I now found a good solution.
When I took the picture I realized how wrinkled the dress looks. I guess, when I knit something I don't really care too much how it looks. I stuff my projects in plastic bags and that shows. But washing and blocking will take all your tears away, so why bother.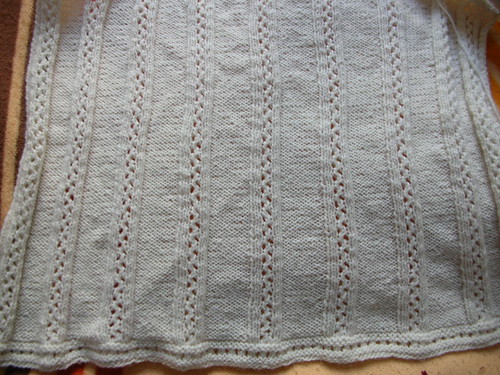
Monday, January 05, 2009
Finished Morning Surf Scarf and handspun yarn
Roving: 4.5 oz Domestic Spinning Wool
Colorway: Cyanotrichite
Dyer: TheFiberDenn.etsy.com
Pattern: Morning Surf Scarf by Jackie Erickson-Schweitzer (scroll down to click on the link, since she had this introductory text I didn't want to link directly to the pattern instructions)
Yarn: Handspun, see above
Color: Cyanotrichite
Price: ?
Amount: about 4.5 oz (about 130 g)
Needles: 3.75 mm (Takumi bamboo needles, they're really nice to knit with. I think they didn't make this annoying scraping noise that the other bamboo needles make. I stopped using them and mostly used wood needles, but resorted to these, because I don't have many 3.75 mm needles and the others were already stuck in some other project.)
Gauge: I think my yarn was in the 13 - 15 WPI (wraps per inch) range. For this she recommends to cast on 66 stitches
Dimensions: Good size for a scarf
Modifications: None, I was a willing slave to the instructions. The pattern is easy, but it's still not fun to knit. I wasn't able to get the pattern in the beginning for whatever reason and ended up tinking and ripping back (20 cm once!) more than I ever had for most of my other knitting projects.
The pattern is great for highlighting short color repeats, because with the dropped stitches you create bigger color patches than you would with a couple of knit stitches and this yarn was a bit problematic. Since I don't have much experience with spinning, the colors in the yarn blended and mixed a lot, creating a somewhat muddy look. If I had chosen a pattern with a lot of stockinette stitch it would have looked even more muddy, but with dropped stitches it turned out not perfect, but also not too ugly. Actually, everybody who saw it assured me that it looked fine. Yay! :)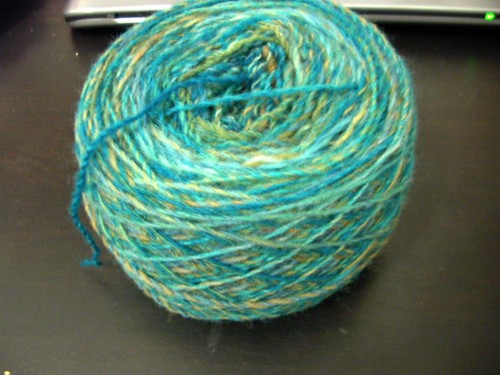
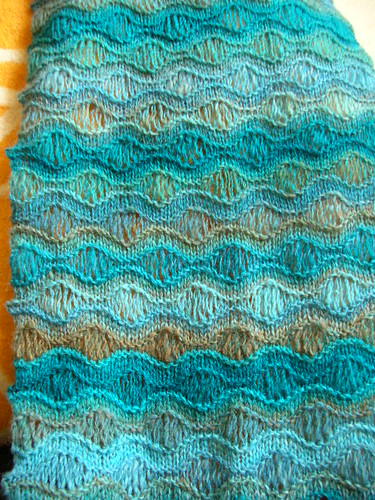
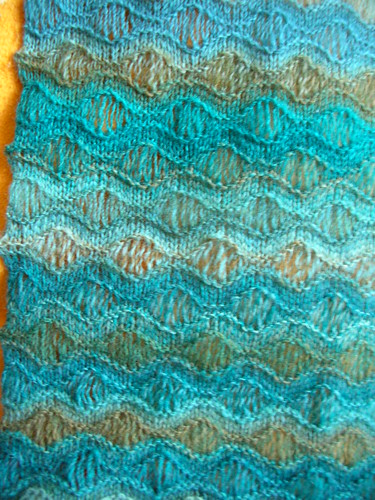
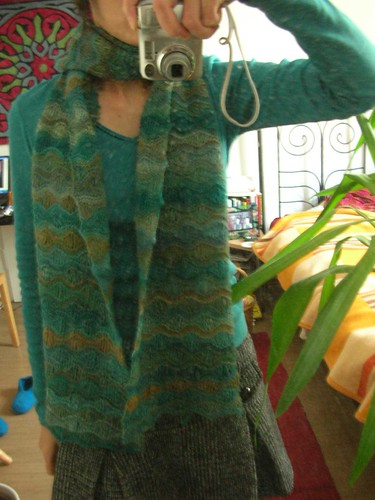
I think I need to clean my mirror... On the floor you can see the slippers made with Feltro that I mentioned here.
The scarf was a Christmas present for my mom and the light was usually not so good for taking pictures, so the pictures are not so great. The colors are also of the kind that are difficult to capture properly. And now I don't have the scarf anymore. I also made a pair of felted slippers for her and my aunt. And I finished another Paisley Shawl for my Grandma in a very nice green alpaca yarn from Drops (she will get it after Christmas though... :o).
Some laceweight yarn that I finished recently: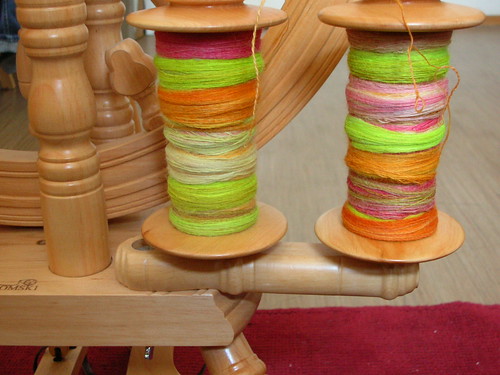
Singles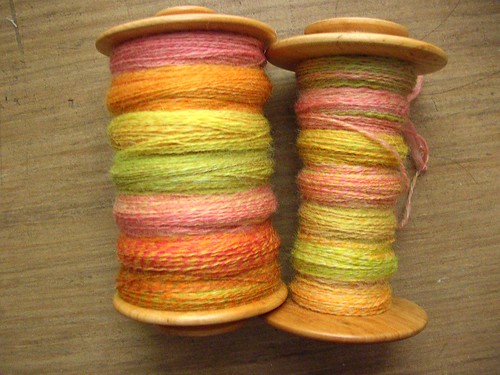
2-plyed laceweight
I'm pretty pleased with how the yarn turned out. Even when they colors got mixed up, the yarn still looked good (on the first full bobbin you can see the colors of the two plies still match, except for the yellow-red and green orange part on the lower part; the yarn on the second bobbin has mixed colors everywhere).
Roving: 4 oz kettle dyed BFL (Blue Faced Leicester)
Colorway: "Summersplash"
Dyer: marion.etsy.com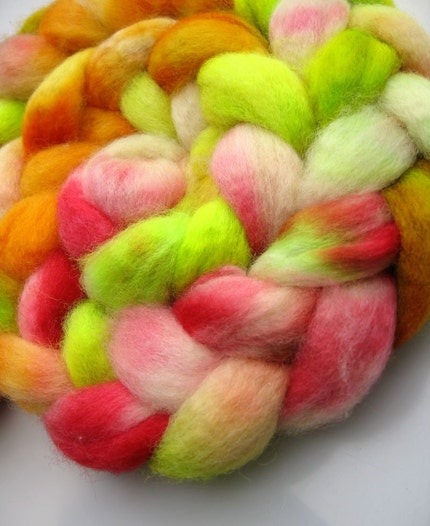
Sunday, November 02, 2008
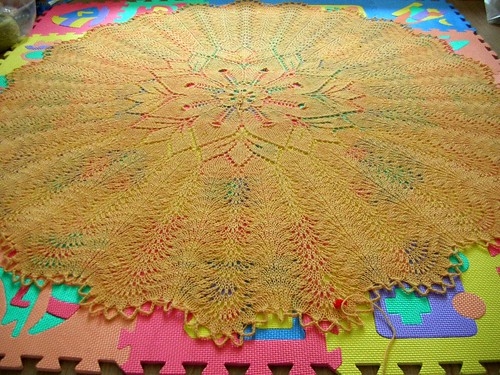
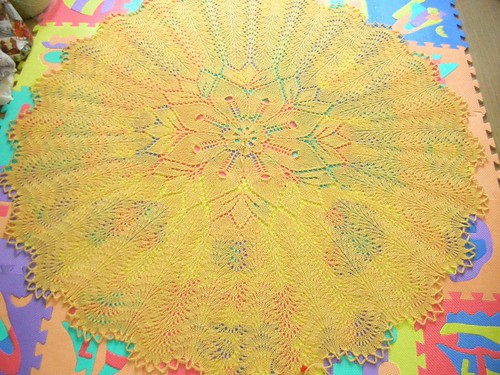
Finished: Feather and Fan Shawl
Pattern: Feather and Fan Shawl by Eugen Beuger. Published in A Gathering of Lace
Yarn: Schachenmayr Nomotta Alpaka Fashion
Color: 122
Price: I was lucky that about half of the balls I used were on sale
Amount: 10? about 475 g. I used a tiny bit of the last ball to bind off and one of the balls was not completely 50 g, because I had used some of it for a previous project
Needles: 5 mm
Gauge: -
Dimensions: about 162 cm diameter sorry, after that girl n's comment I checked and it's actually 144 cm
Modifications: I stopped after row 126 and started doing the last edging rows
Comment: I've heard that people knitting the Hemlock Ring Blanket had problems with the feather and fan pattern puckering too much despite blocking (a not so easy task from what I have heard. I got told that someone compared it with fighting with an octopus). My guess was that there are not enough repeats in the round and this causes the puckering (the other variation is that the blanket grows too fast in diameter/length). With this blanket I had zero problems with blocking, just the usual fussing, but there was no excessive use of force needed to whip this thing into shape as other knitters seem to have with the Hemlock Ring, and I also haven't noticed any puckering yet. It's nice and flat without any visible tensions.
I'm counting 8 repeats of the feather and fan pattern in the round for the Hemlock Ring and this pattern has 24 repeats in the round. I haven't looked at the feather and fan pattern version of the Hemlock Ring myself, but from what my friends told me it seems to be knit in a similar as the feather and fan pattern in the shawl. My conclusion is that if I wanted to knit the Hemlock Ring I probably would work in modifications.
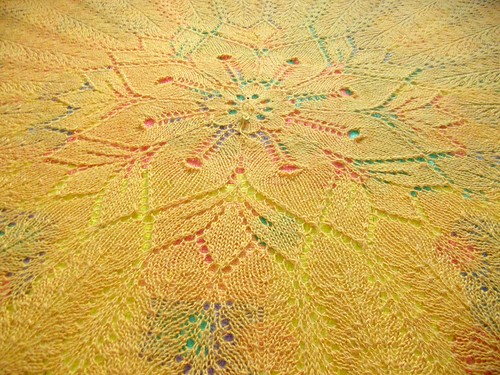
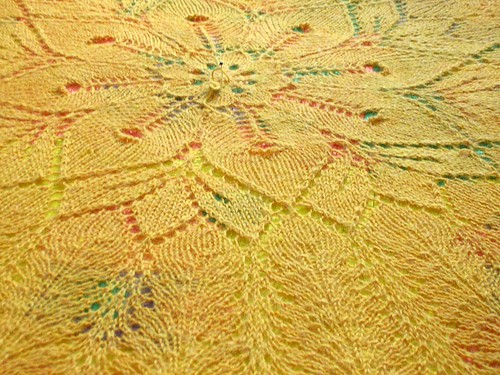
The reason I chose the Feather and Fan Shawl was the play of light and dark in the feather and fan pattern (which I'm actually only realizing now as the thought that floated my mind when I saw the shawl the first time was, "I want to knit that one!") and because I liked the flower in the center better. With the flower and the bright color the blanket looks very sunny.
Next time I would choose a thicker yarn though. It's still more like an übersize shawl than a blanket. The yarn is great though. I have a wrap cardigan that my mom made for me in the same yarn and it's really really soft. It's a delight to work with. I have three balls in red which I initially wanted to use for a shawl; now I want to use them for a beret. We'll see.
I washed the blanket in the washing machine (washing programm: wool, cold) with a regular wool wash, because it was too big to wash it in the sink. By the way, I wash most of my wool stuff in the washing machine (cold), even when it's not superwash wool. If I want to give an item a special treatment and when it's not too big I handwash it with Kookaburra, but that's it.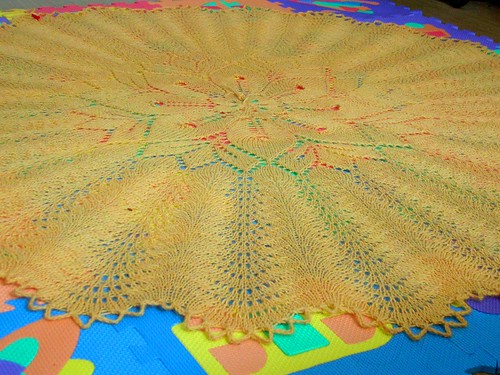


Thursday, October 09, 2008
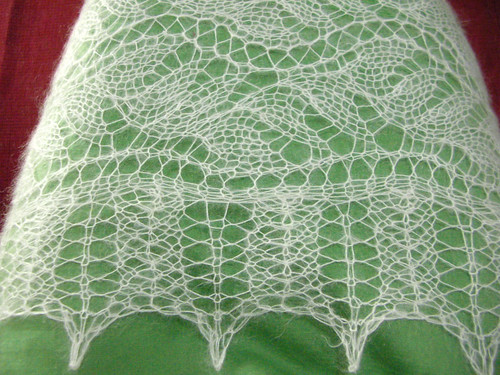
Finished: wedding stole
Pattern: Lead or Follow Lace Scarf by Jackie Erickson-Schweitzer
Yarn: Rowan Kidsilk Haze, 210 m (229 yds)/25 g, recommended needle size 3.25 mm - 5 mm, gauge 18-25 stitches x 23-34 rows in 10 x 10 cm, 70% super kid mohair and 30% silk
Color: "Cream" #634 (it's an off-white, the other off-white Rowan offers is "Pearl", but it looks darker. The true white shade, "Bleached", what an awful name for a color, by the way, is discontinued.)
Price: about $13 per ball
Amount: 3 and a tiny bit of the forth to finish the last row before the binding-off row and the binding-off row
Needles: 5 mm
Gauge: -
Dimensions: about 192 x 68 cm
Modifications: I decided to go for a different border since I wanted it to look like a stole and less like a scarf. I kept the inner border though and added a similar row with holes on both ends. For the outer border used the one from the Lily-of-the-valley shawl from the book "Lace Style."
Width:
I did the 12 stitch repeat five times. I left out the 13 stitches part on the right side and the 13 stitches part on the left side. Total cast-on: 79 stitches (including the slip stitches on both sides, one for each).
Length:
12.5 repeats.
Inner border:
I wanted both ends of the stole to have a similar inner border as the ones on the side, which consisted of yarnovers and a garter stitch edge. I started with a provisional cast-on and knit three rows in garter stitch and then knit the row with holes.
Subtracting the slip stitches and the inner borders I had 69 stitches in the middle left. My plan was to [k2tog, yo] until the end. As I wanted to start and end with a yarnover though I had to knit the last three stitches together in order to maintain the same number of stitches.
When your stole is long enough, finish with a row with holes and three garter stitch rows.
Outer border:
For the border you need a multiple of 8 +2 stitches.
I increased 11 stitches on both ends = 90 stitches (it might not be necessary to pick that many for the border. Either that or I should have picked up more stitches on the side. The border on both sides is more stretched than the border on the two ends).
For both sides of the stole you're supposed to pick up three stitches from two slip stitches. I had to drop some of the picked up stitches (three on one side and five on the other? My inner perfectionist ran amok when it realized that things were not working out as expected.) in order to get a multiple of 8 + 2. I picked up 226 stitches on each side.
By the way, there are mistakes in the border (row 11 and 13). In the pictures you will see that the yarnovers are on both sides of the corner center stitch (count them), but the charts will tell you that the center stitch and the yarnovers in row 11 and 13 are separated by one knit stitch. Of course, I did notice that the pattern was kind of irregular, but instead of stopping and investigating further, I ignored the tiny nagging voice in my head that was preventing me from blissful mindless knitting. But it was ok, in the end I just had to figure out how to fix a mistake a couple of rows down in a lace pattern. Why have it easy when it can also be complicated and fun. :D It was fixable though without too much fussing around.
The border is really pointy. That's because I added extra stitches when binding off, meaning after binding the yarnover before a center stitch, I knit a stitch (basically you crochet a new stitch), bound off the center stitch, knit/crochet another stitch, bound off the yarn over. I think the border is a bit too pointy, but I really don't want to deal with this stole anymore. It has already woken up the perfectionist in me and that one exhausts me.
Difficulty: The pattern is doable and not really difficult. It is true lace and you also have to pay attention on the wrong side rows, but it's not too difficult. I recommend that you divide (highlight) the rows into groups of four, that makes it easier to read, but it also disentangles the pattern a bit.
Blocking was a pain in the ass. The stole is huge and I had no clue how and how much I wanted to block it. I spent an hour and half shifting the pins around till it looked right. The pattern seems to look better when you stretch it more lengthwise. The stole is very hole-y and the stitches are bigger than I would usually knit them, but I like the stained glass look here, it goes well with this pattern.
Overall I think it looks nice. I was a bit unsure before, but as a friend of mine said, just look on Ravelry for projects with Rowan Kidsilk Haze, everything knit with it will look nice. And I tend to agree with her.
Now, all I have to do is get this stole in time to my friend!
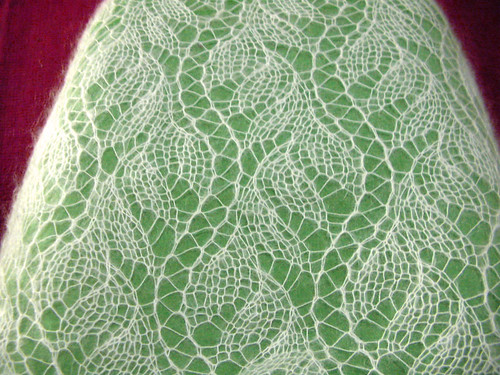
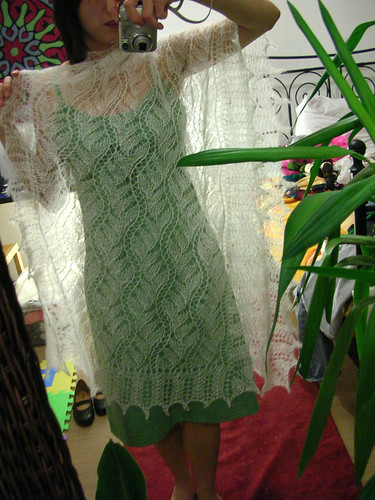
I went shopping today hence the green summer dress at a time when I have already turned on the heating... I'm not running like that anymore in case you were wondering. :D My intention was to buy winter skirts, but I came back with this summer dress (and a winter skirt). It doesn't look like a very clever idea, but it was on sale, and I know if I buy it now I will have enough dresses next summer. I don't really like this kind of anti-cycle shopping, but it's not such a bad idea for me actually. I don't care about shopping and I just hate having to shop when I need something now (like the winter skirts). I know, when next summer I open my wardrobe and find a new dress that has even already been paid, I'll be happy. :)
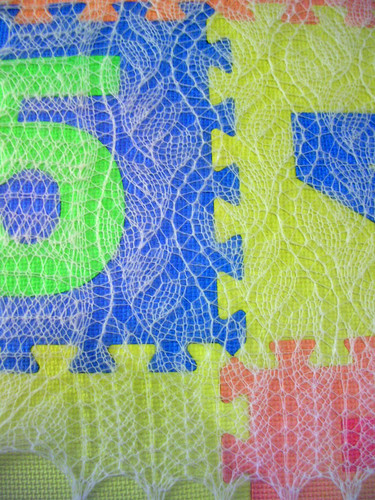
Since I have posted masses and masses of pictures it should be clear to you now why it's called "lead or follow lace," right?? :D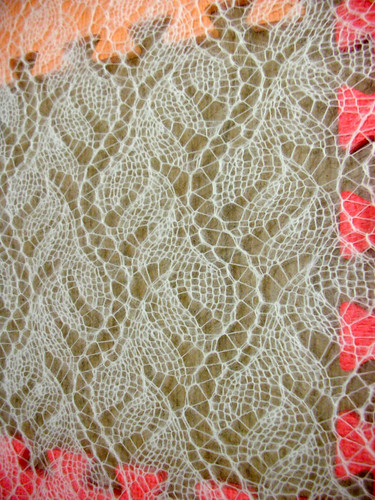
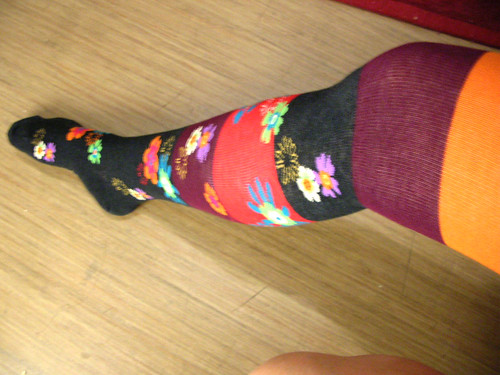
By the way, I got these a couple of days ago, too. You have to admit, they are really cute, aren't they? I wish they also had the tights in my size.
Saturday, September 20, 2008
Finished: Lilly's Leaf Shawl
Pattern: Lilly's Leaf Shawl by Lillysmuul
Yarn: Wollmeise sock yarn, 100% merino superwash, 150 g skein (574 yards), 350 m/ 100 g, wash at 30 °C
Color: "Farn"
Price: around 15 € per skein?
Amount: well, more than I thought in the beginning! I ran out of yarn after finishing the body and I had to start a new skein for the edge. Of course, I hadn't bought a second skein. I tried the skein that one of my friends had, but the color was too muted. I finally succeeded obtaining another skein by contacting Claudia from Wollmeise. She was supernice and did indeed have a similar skein. It's not a perfect match, but the difference is not too obvious.
Needles: I think 4.5 mm (sorry, I didn't write it down and between finishing and blocking a lot of time passed. I finished it sooo quickly, but not having jigsaw mats to block it delayed the whole finishing process.)
Gauge: -
Dimensions: 168 wide and from the center to the tip it's 80 cm (I measured after blocking it, usually my shawls shrink a bit after that)
Modifications: none
It's a nice and easy pattern. The main body is composed of a quite popular Estonian stitch pattern that I have already seen used a couple of times in other shawl designs. At the upper edge and on both sides of the center you have a leaf pattern.
The yarn surprisingly looks very very much like cotton. If I didn't know that this was merino, I would have assumed that this was cotton. Many knitters I know think the same. I don't think this is something positive or negative, I was just surprised about its texture. The colors are fabulous, many many shades of green. I really really liked the first skein I bought. The colors were brilliant and just perfect greens. The second skein was also nice, but the green was tiny bit more muted and blueish. I'm usually not such a Wollmeise fan, but this colorway I liked a lot.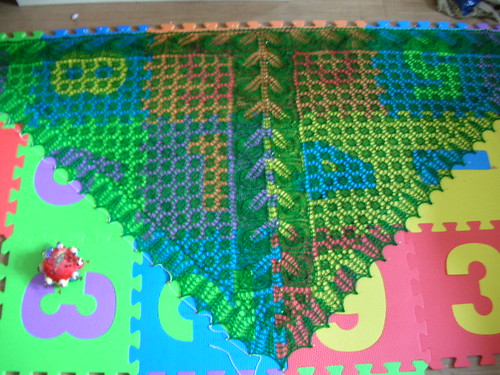
The next two pictures were taken by a friend's boyfriend.

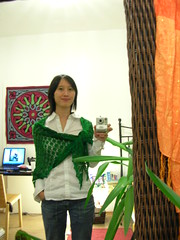

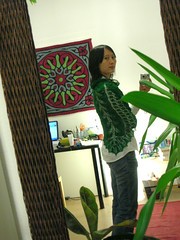
I'm not sure if I should keep the shawl or give it away. I never knit shawls in this size (it's really big) and I have no clue how to wear it without looking like a granny. I think it doesn't look that bad in the first picture. I could also use it like a scarf and wrap it around my neck. Or I could give it to my grandma who likes green. Shall I keep it? What do you think?
Friday, August 08, 2008
Finished: Gretel beret
Pattern: "Gretel" beret by Ysolda Teague (I'm also wearing the Backyard Leaves Scarf by Annie Modesitt)
Yarn: Numero Uno Tweed by Lana Grossa
Color: Green
Price: ?
Amount: 1.5 balls?
Needles: ?
Gauge: a bit smaller, I think, but the beret is still big enough
Dimensions: Fits
Modifications: None
I'm pretty late with posting about that one, I think I finished it last year? But never say never! (Hmm, that green of the scarf looks a bit dull in the picture...). It's a ver nice pattern. I made another one with Rowan Felted Tweed in pink, but I haven't uploaded the pictures yet. The cables take a lot of time though, even when you don't use a cable needle.
Wednesday, January 16, 2008
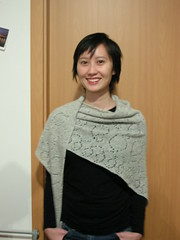
Finished: Paisley Shawl
Pattern: Paisley Shawl by Kate Gilbert from the book Folk Style
Yarn: Rowanspun 4 ply, 100% pure new wool, 148 m/25 g
Color: Squirrel (very light grey)
Price: about 1.6 € per skein
Amount: 5 skeins
Needles: 3.5 mm
Gauge: perfect, although I have no clue how many stitches are in 10 cm :D
Dimensions:
Modifications: None
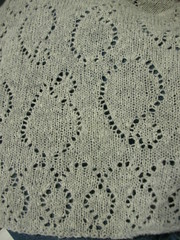
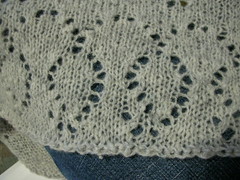
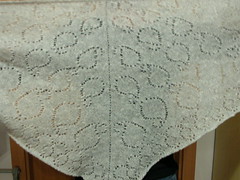
It took me a couple of weeks to finish this shawl, because except for the repeats in the rows, there is no real pattern repeat, every row is different. Which means you have to pay attention to the knitting instructions. People are always so afraid of lace, but a lot have nice pattern repeats that you can memorize well and even if it's not nirvanalike blissful mindless knitting, it's still ok. The Flower Basket Shawl or the Shetland Triangle consist of stitch patterns that are quite easy to memorize. After a while you realize that what you knit is related to the previous row, meaning the stitches in your previous row lead and guide you in your current row. This pattern though requires you to pay attention, you can memorize the repeats in the rows, but you can not really rely on the previous rows much to help you forsee the next stitch you have to knit.
Nevertheless, I have to say this is probably one of my favorite knitting projects, not so much for the knitting fun, but I love the end product. While I was knitting I was wishing a bit that I was knitting with alpaca, because the yarn was not as smooth and had some slubs, which slows the knitting down a bit. The grey was also not a true grey, but has a little bit of a yellowish base due to the natural color of the wool shining through. And all the grey was also boring me a bit. My Mystery Stole - light grey (I haven't posted yet, because I need to reblock it properly, my lazy approach with a few pins didn't work very well this time...), my Esther Williams hat - light grey. But after seeing the finished shawl I'm convinced, the yarn is perfect for this pattern and the color is great, I don't notice the yellow undertone anymore - what can I say, I'm blinded by the beauty of my shawl :D. It's perfect, it's flawless, it's simply lovely! :D And can you believe it? I get such a nice warm shawl for about 8 €! I need to stock more of this yarn, I really like it.
At the moment I have another Paisley Shawl on my needles, this time it's alpaca in a lovely dark green, but I think I will have to frog it. Alpaca is a heavy yarn and this is a big shawl that is mostly knit in stockinette stitch. I'm therefore a bit afraid that it will turn out too heavy. A more lacy project might suit this yarn better.